The short answer
Stake and square the site, dig the holes below the frost line, pour the pads, set and brace the posts, cut them to the eave line, lift the trusses, run the purlins, roof it, then girts, wall steel and doors. A 30x40 takes 19 posts set 4' deep and 8' apart, 6 trusses and about 150 to 225 labor hours for two people.
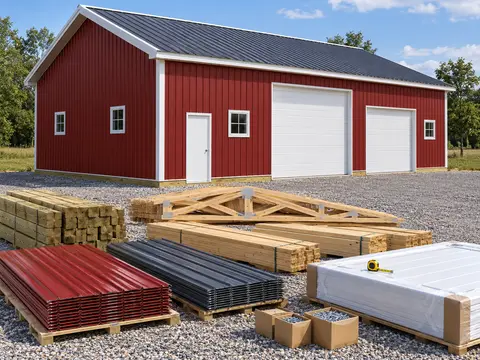
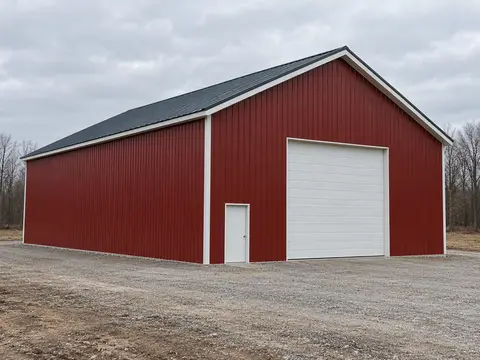
How to build a pole barn comes down to ten steps in a fixed order: site, holes and pads, posts, eave line, trusses, purlins, roof steel, girts, wall steel and trim, and doors. Each step ends with something to confirm before the next one, and every number below comes from the build order in our builder’s plan for a 30x40 pole barn, a 10 ft eave, a 4/12 roof and 30 psf of ground snow. The county post-frame guides and the Post-Frame Building Handbook1 (NRAES-1) are behind the rules, and they are named where they set a number.
A 30x40 takes 19 posts, 6 trusses and about 150 to 225 labor hours, roughly 9 to 15 working days of 8 hours for two people. If you are still choosing the size, the barn designer draws any width from 20 to 40 ft and checks it for your loads; if you want the numbers first, start with what a pole barn costs.
- 1NRAES, Cornell University Post-Frame Building Handbook, NRAES-1, D. Carson and others (1997 revision)
Before You Dig: Plan, Permit and Trusses
Depends on where you build
Ask your building department first
A pole barn is a building, and many places want a permit for one, but the rules vary by state, county and town, and some exempt farm buildings. Ask before you order anything. If a permit is needed, expect a site plan with the setbacks, the building plan and the truss drawings. The same office gives you the three numbers the design depends on: the ground snow load, the wind speed and the frost depth.
Order the Trusses Early
Trusses are made to order. The truss maker’s engineer designs them for your span, pitch, spacing and loads, and the drawing is usually sealed by a professional engineer registered in your state (NFBA2, Frame Builder, 2022). Our plan includes a truss order sheet with those numbers for exactly that reason; send it as soon as the design is final, because trusses are built after the order, not taken off a shelf.
Tools and Rentals
Beyond carpentry tools you will want a transit or laser level, a string line, an auger (a tractor-mounted one saves days on 19 holes), and a lift or scaffolding for the trusses and the roof. A second person is not optional when the trusses go up.
- 2National Frame Building Association Guide Specification for Post-Frame Building Systems (Aug 25, 2023)
- 3National Frame Building Association, Frame Builder Truss, But Verify, B. Bolduc, PE, SE (Aug 2022)
Step 1: Stake and Square the Site
Strip and level
Take off the topsoil and level the pad. On soft or wet ground, add a few inches of compacted stone; it keeps the floor dry whether or not you pour a slab later.Stake the corners
Set the four corners from the post layout, outside face of the posts.Run batter boards
Put batter boards and string lines a few feet outside the corners so the strings survive the digging.
Measurements
The 30x40 pole barn, as the designer draws it
- footprint
- 30' x 40'
- outside of the posts
- both diagonals
- 50'
- equal within 1/2 in before you dig
- sidewall bays
- 5 x 8'
- 6 posts on each sidewall
Confirm before you continue
Both diagonals match
Measure corner to corner both ways. They must agree within 1/2 in before the first hole: getting it right here is easier than fixing a wall that is out of square after the steel is on.
Step 2: Dig the Holes and Pour the Pads
For the 30x40 that means 19 holes 24 in across, dug to 5': 4' of post in the ground plus the pad under it.
Safety
Before the auger touches the ground
Call 811 a few working days before you dig so buried power, gas and water lines are marked. A tractor auger can catch loose sleeves and bind in roots or rock: keep helpers and children well clear while it turns.
Mark every hole
Measure each post center off the string lines, not off the hole next to it.Dig to depth
Dig every hole to the same depth below the string line.Pour the pads
Pour a concrete pad at the bottom of each hole, at least 8 in thick (Cass County, Missouri) and at least half its diameter (Clermont County, Ohio).
Measurements
The 30x40 pole barn, as the designer draws it
- holes
- 19
- 24 in across
- hole depth
- 5'
- 4' of post plus the 12 in pad
- concrete pad
- 24 x 12 in
- across by thick, level at the bottom
- concrete, 80 lb
- 193 bags
- for the pads and the collars
How Deep the Posts Go
The post goes at least 48 in into the ground and below your frost line, whichever is deeper. That 48 in floor is in the Colorado ICC6 chapter guide, the Alexander County7, North Carolina guide and the Cass County4 standard. Posts on an open side, like a carport or an open bay, go 2 ft deeper (Cass County). The post spacing and depth calculator gives the holes for your frost line and width.
Confirm before you continue
Every pad level and at the same depth
Check each pad against the string line. A pad that is high makes a post that is high, and the eave line in step 4 will show it.
- 4Cass County, Missouri 201.3 Post Frame Building Standards
- 5Clermont County, Ohio Post Frame Construction Guide, RCO 328 (rev. Dec 17, 2025)
- 6Colorado Chapter ICC, hosted by the Town of Evans Pole Barn Construction (Sep 11, 2023)
- 7Alexander County, North Carolina Pole Barn Construction
Step 3: Set and Brace the Posts
Stage 1 of 7
Holes, pads and posts
Corners first
Set the four corner posts on their pads, then the posts between them on a string line.Brace each post
Brace it plumb in two directions with stakes and 2x4s.Uplift bars
Drive the two uplift bars through the bottom of the post.Collar and backfill
Pour the concrete collar around the base, then backfill the rest of the hole.
Pole Barn Post Spacing
On the 30x40 the sidewall posts are 8' apart, the spacing the Clermont County5 guide sets as its maximum, and a truss lands on every pair of them. The endwall posts are no more than 8 ft apart too, with a jamb post each side of the overhead door. Lengths that do not divide into 8 ft frame on 6 ft or 10 ft bays instead: 6 ft passes with lighter purlins, while 10 ft needs trusses designed for that spacing and heavier purlins and girts, so the designer asks for a review. Pole barn truss spacing compares the three.
Treated Posts and the Uplift Collar
The posts are pressure-treated to AWPA8 Use Category UC4B, ground contact heavy duty, which the NFBA2 guide specification requires for any post below grade. The collar is 12 in of concrete around the bottom of the post with two #5 bars 9 in long through it, the uplift anchor in the Clermont County5 guide. The Post-Frame Building Handbook1 (NRAES-1) puts the gain plainly: a collar like this resists wind uplift four times or more better than tamped earth with no footing.
Measurements
The 30x40 pole barn, as the designer draws it
- posts
- 19
- 6x6 post, treated UC4B
- in the ground
- 4'
- 6' on open sides
- sidewall spacing
- 8'
- on center, a truss on every pair
- uplift collar
- 12 in
- concrete at the bottom of each post, two #5 bars through it
Confirm before you continue
Every post plumb on two faces
Every post plumb on two faces, and every outside face on the string line. Leave the braces on until the trusses and purlins are in.
- 1NRAES, Cornell University Post-Frame Building Handbook, NRAES-1, D. Carson and others (1997 revision)
- 2National Frame Building Association Guide Specification for Post-Frame Building Systems (Aug 25, 2023)
- 3National Frame Building Association, Frame Builder Truss, But Verify, B. Bolduc, PE, SE (Aug 2022)
- 5Clermont County, Ohio Post Frame Construction Guide, RCO 328 (rev. Dec 17, 2025)
- 8American Wood Protection Association U1-24 Use Category System, excerpt (2024)
Step 4: Cut the Posts to the Eave Line
Mark from one reference
Mark the eave height on every post with a laser or a water level, never by measuring up from the ground at each post.Cut the tops
Posts are ordered long and cut in place.Bolt the eave girts
Bolt a pair of eave girts at the top of each sidewall, one on each side of the posts, where the trusses will bear.
Confirm before you continue
The eave girts are level end to end
This is the line the whole roof sits on. Check it from end to end before a truss goes up.
Step 5: Set the Trusses
Stage 2 of 7
Eave girts and trusses
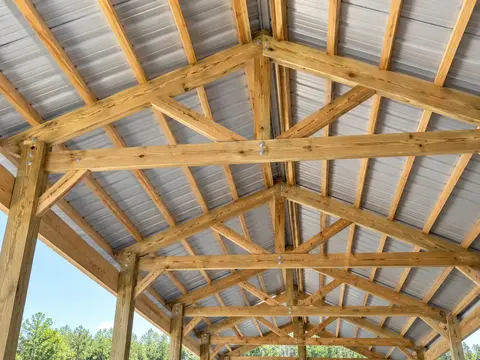
Lift the trusses onto the posts, one on every pair of sidewall posts. Clark County9, Ohio requires the truss spacing to line up with the posts, or a girder to carry the trusses in between. Bolt each truss to its posts with two 1/2 in through-bolts unless the truss maker says otherwise.
Measurements
The 30x40 pole barn, as the designer draws it
- trusses
- 6
- 4 common, 2 gable end
- span
- 30'
- 4/12 pitch, 1' overhang
- on center
- 8'
- one on every pair of sidewall posts
- through-bolts per post
- 2 x 1/2 in
- unless the truss maker's drawing says otherwise
Temporary Bracing Is Yours to Install
The Post-Frame Building Handbook1 is direct about it: construction bracing is not usually part of the truss package and is the builder’s responsibility. Follow the truss maker’s drawing and the industry bracing guide it refers to. The permanent bracing, diagonals across the bottom chords and lateral rows along them, goes in with the purlins.
Safety
Trusses fall like dominoes
Brace the first truss to the ground before you set the second, and brace each one as it goes up. Never leave a row of trusses standing overnight without the bracing, keep everyone out from under a truss while it is lifted, and stop lifting in wind.
Confirm before you continue
Every truss plumb and on its spacing
Measure the spacing both at the ridge and at the heel, and check each truss for plumb.
- 1NRAES, Cornell University Post-Frame Building Handbook, NRAES-1, D. Carson and others (1997 revision)
- 9Clark County, Ohio Pole Building Section (RCO 328 summary) (rev. Oct 31, 2022)
Step 6: Run the Purlins
Stage 3 of 7
Purlins
Purlins on edge carry the roof steel between the trusses. On the 30x40, with trusses 8 ft apart and 30 psf of ground snow, the designer uses 2x6 on edge at 24 in in on center, with a hurricane tie at every truss under each purlin end. The Colorado ICC6 guide asks for purlins on edge with blocking when trusses are more than 4 ft apart, and the Clermont County5 guide caps the spacing at 24 in. The purlin spacing calculator sizes them for other spacings and snow loads.
Measurements
The 30x40 pole barn, as the designer draws it
- purlins, on edge
- 2x6
- 24 in on center, 10 lines a side
- purlin span
- 8'
- truss to truss
- of its bending limit
- 57%
- at 30 psf of snow; the designer uses at most 95%
Confirm before you continue
The roof plane is true
The purlins are straight, and the roof plane is true along a string pulled from end to end.
- 5Clermont County, Ohio Post Frame Construction Guide, RCO 328 (rev. Dec 17, 2025)
- 6Colorado Chapter ICC, hosted by the Town of Evans Pole Barn Construction (Sep 11, 2023)
Step 7: Put the Roof Steel On
Stage 4 of 7
Roof steel
Roof before walls: it gets the frame out of the weather and gives you shade for the rest. The 30x40 roof takes 28 panels, $1,430.22: 29-gauge exposed-fastener rib panels with 36 in coverage, cut to length so there are no end laps. Metal Sales10 specifies #10-14 wood screws for its rib panel, with side-lap screws 12 in on center.
Start downwind
Start at the end away from the storm wind.Square the first panel
Square it to the eave; every panel after it follows the first.Screw to the pattern
Use the screw pattern your supplier gives, seated, not crushed.
Measurements
The 30x40 pole barn, as the designer draws it
- roof panels
- 28
- 17 ft 1 in long
- roof pitch
- 4/12
- 0.3 degrees from level
- roofing screws
- 5 boxes
- of 250, with washers
Safety
Working on the roof
Work from a lift or scaffolding at the eave, and wear a harness on the roof. Steel is slick with dew, frost or sawdust, and a panel catches wind like a sail: do not carry panels up in wind. The cut edges are sharp, so wear cut-resistant gloves.
Confirm before you continue
Panels square to the eave at both ends
A panel that creeps out of square shows at the far gable as a sawtooth edge. Check it every few panels.
- 10Metal Sales Classic Rib Condensed Technical Reference (Jan 2026)
Step 8: Girts, Skirt Boards and Openings
Stage 5 of 7
Skirt, girts and openings
Skirt board
Start at the bottom with the skirt board, a 2x6 on edge at grade, treated for ground contact (AWPA lists post-frame skirtboards as Use Category 4A).Wall girts
Lay the girts flat across the outside of the posts, 24 in on center, the most the Clermont County guide allows.Openings
Frame the door and window openings as you go.
Measurements
The 30x40 pole barn, as the designer draws it
- wall girts, flat
- 2x4
- 24 in on center
- skirt board
- 2x6
- on edge at grade, treated for ground contact
- between wall braces
- 25'
- at most, the first within 12' of each corner
- knee brace drop
- 18 in
- down the post on open sides
Wall Bracing
Let diagonal braces into the walls, flat on the inside of the girts, from the skirt at one post to the eave girt at the next: no more than 25 ft apart and the first within 12 ft of each corner, the Clermont County5 rule. Open sides get 2x6 knee braces at 45 degrees from post to truss instead, 18 in down the post on a 9 ft carport wall (Clark County9, Ohio sets the drop by wall height).
Confirm before you continue
Girts level, openings square
Girts level from post to post, and each opening square, its diagonals equal.
- 5Clermont County, Ohio Post Frame Construction Guide, RCO 328 (rev. Dec 17, 2025)
- 8American Wood Protection Association U1-24 Use Category System, excerpt (2024)
- 9Clark County, Ohio Pole Building Section (RCO 328 summary) (rev. Oct 31, 2022)
Step 9: Wall Steel and Trim
Stage 6 of 7
Wall steel, trim and doors
Trim goes on in an order that sheds water. Each piece laps over the one below it, so rain runs off the outside and never behind:
Base trim
First, along the skirt board.Wall panels
Then the steel, square to the base trim.Corner and J-trim
Around the corners, the doors and the windows.Eave and rake trim, ridge cap, closures
Last, with the foam closures at the eave and under the ridge.
Confirm before you continue
No daylight, no crushed washers
No daylight at the closures, and every screw seated, not crushed. An overdriven screw splits its washer and leaks.
Step 10: Hang the Doors
Hang the overhead door, the walk door and the windows to their makers’ instructions. An overhead door needs 16 in of clear space above the opening for its track and spring, the figure in the Post-Frame Building Handbook1, so check the headroom before you order the door, not after.
Measurements
The 30x40 pole barn, as the designer draws it
- overhead door
- 10' x 8'
- width by height
- door header
- 2-ply 2x8
- uses 83% of its bending limit, 95% at most
- clear above the opening
- 16 in
- for the track and the spring
Safety
The overhead door spring
The torsion spring above an overhead door stores enough energy to injure. Leave winding and adjusting it to the door installer, or follow the door maker’s instructions to the letter.
Confirm before you continue
Doors run and close flush
The doors run without binding and close flush, and the overhead door clears its track and spring.
- 1NRAES, Cornell University Post-Frame Building Handbook, NRAES-1, D. Carson and others (1997 revision)
After the Shell: Floor, Insulation and Power
Stage 7 of 7
Concrete floor
A slab goes in after the shell is up, poured inside the skirt boards. Our plan budgets it but does not design it: the thickness, base, reinforcement and joints come from your concrete contractor. Insulation and wiring are separate projects; if you plan to heat the barn, decide on the insulation before the wall steel goes on, because some systems go behind it.
What a Builder’s Plan Adds
The free designs show the frame, the checks and the priced materials list on screen. The builder’s plan for your barn draws it sheet by sheet: the post layout dimensioned from one corner, the posts and footings, every wall framed, the truss order sheet, the roof framing, the steel panel by panel, the cut list, the shopping list and this build order with its checks. Start from the 30x40 pole barn, any of the free pole barn plans, or your own size in the designer.
Sources
Every number in this guide that does not come from our own barn designer was checked against these 12 documents, numbered in the order the text first cites them and read on Oct 13, 2026. 12 are county guides, handbooks and makers.
- 1NRAES, Cornell UniversityPost-Frame Building Handbook, NRAES-1, D. Carson and others (1997 revision)
- 2National Frame Building AssociationGuide Specification for Post-Frame Building Systems (Aug 25, 2023)
- 3National Frame Building Association, Frame BuilderTruss, But Verify, B. Bolduc, PE, SE (Aug 2022)
- 4Cass County, Missouri201.3 Post Frame Building Standards
- 5Clermont County, OhioPost Frame Construction Guide, RCO 328 (rev. Dec 17, 2025)
- 6Colorado Chapter ICC, hosted by the Town of EvansPole Barn Construction (Sep 11, 2023)
- 7Alexander County, North CarolinaPole Barn Construction
- 8American Wood Protection AssociationU1-24 Use Category System, excerpt (2024)
- 9Clark County, OhioPole Building Section (RCO 328 summary) (rev. Oct 31, 2022)
- 10Metal SalesClassic Rib Condensed Technical Reference (Jan 2026)
- 11Larimer County, ColoradoPrescriptive Design for Pole Barns (Mar 1, 2022)
- 12Union CorrugatingMasterRib panel data sheet (Rev. 03/21)